适用场景
远程应用 OTP 代填主要适用于以下场景:
- 目标系统是 Web 登录页面
- 用户通过 JumpServer 远程应用 / 虚拟应用 访问该系统
- 登录过程中除账号密码外,还需要输入 OTP / MFA 动态验证码
典型示例: - JumpServer 纳管某个 SaaS / 内部门户 / 运维平台
- 登录页要求填入:
- 用户名
- 密码
- OTP(如 TOTP 6 位码)
通过对应配置可使得 JumpServer 代填时自动基于配置好的 OTP 密钥计算并填写 OTP 验证码
使用步骤
目前远程应用只支持通过代填脚本的方式实现 OTP 码的自动代填,具体参考代填脚本示例
1. 下载应用包
前往 JumpServer 应用商店下载对应的应用
若使用远程应用则需要下载 Microsoft Edge(版本>=0.2.1)
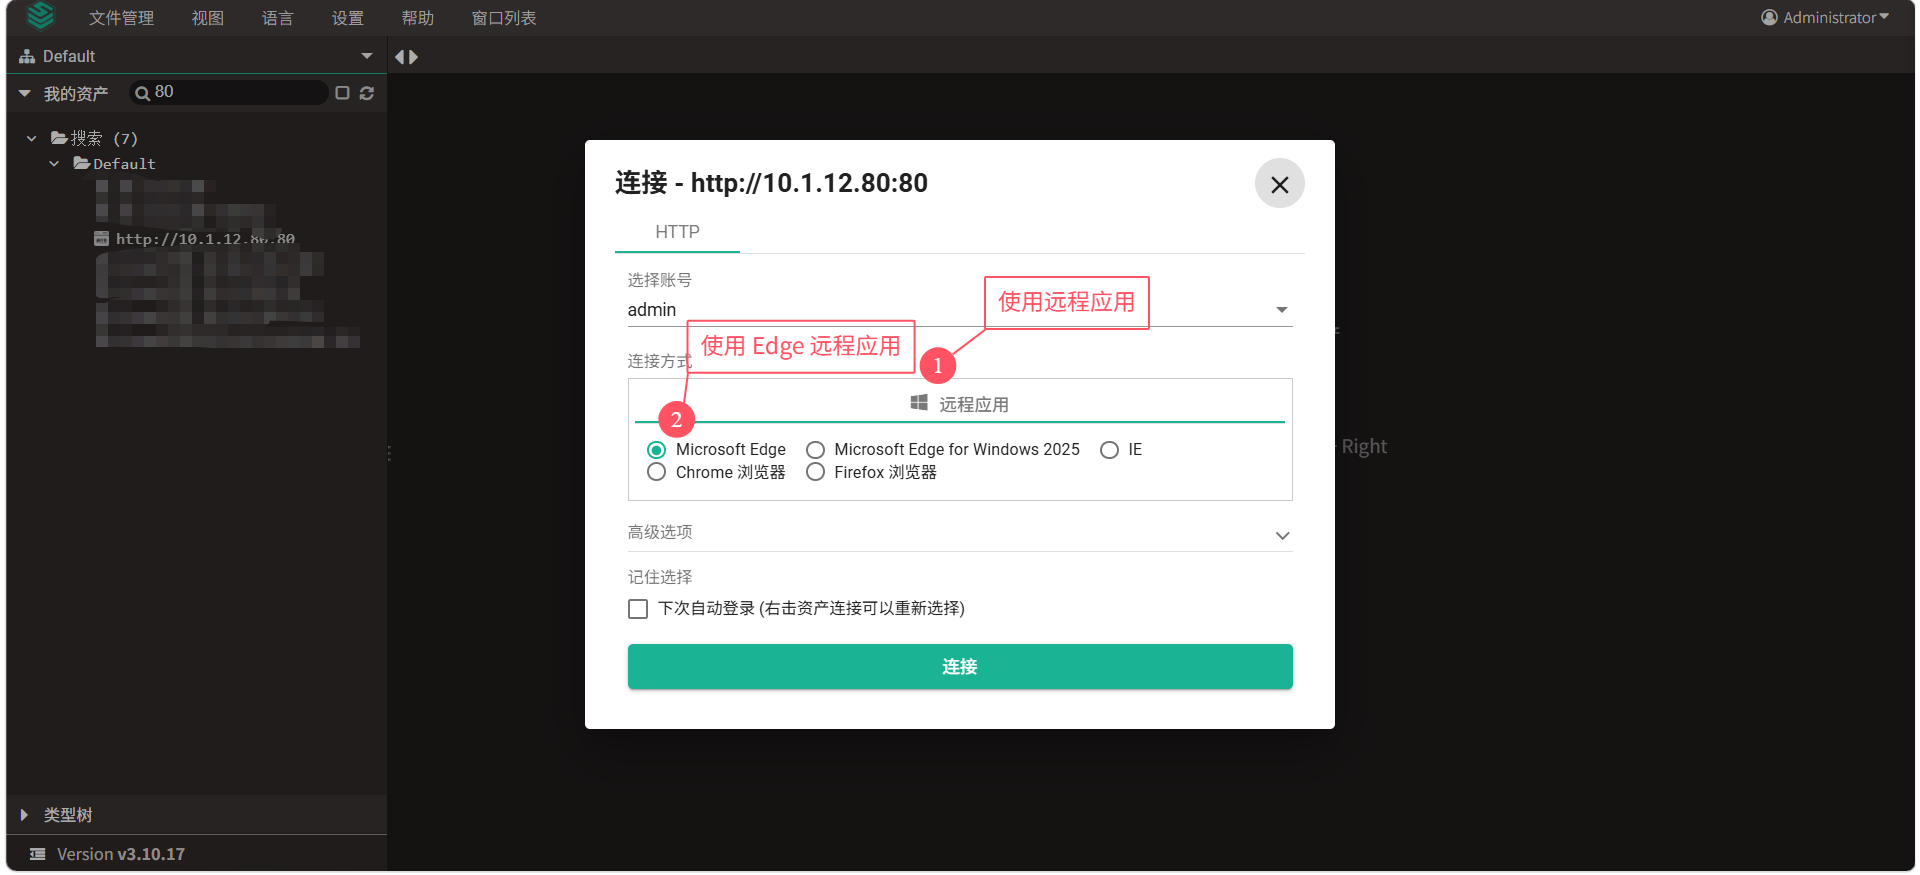
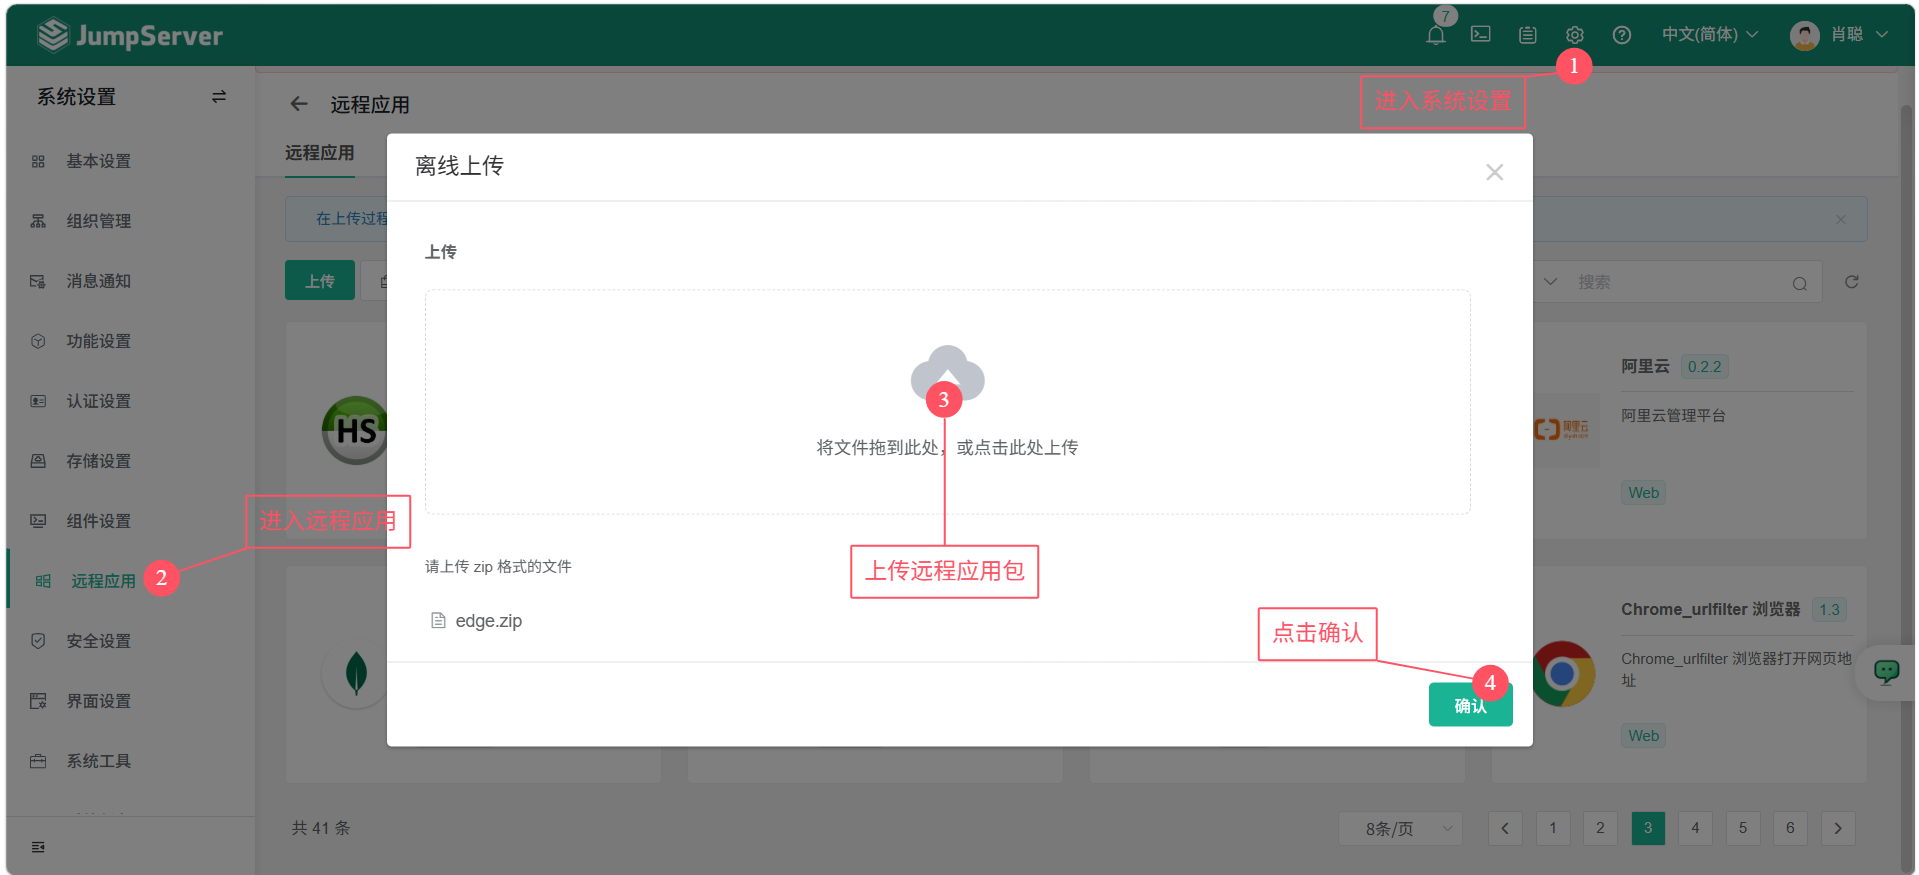
2. 导入远程应用(以 Microsoft Edge 0.2.1 版本为例)
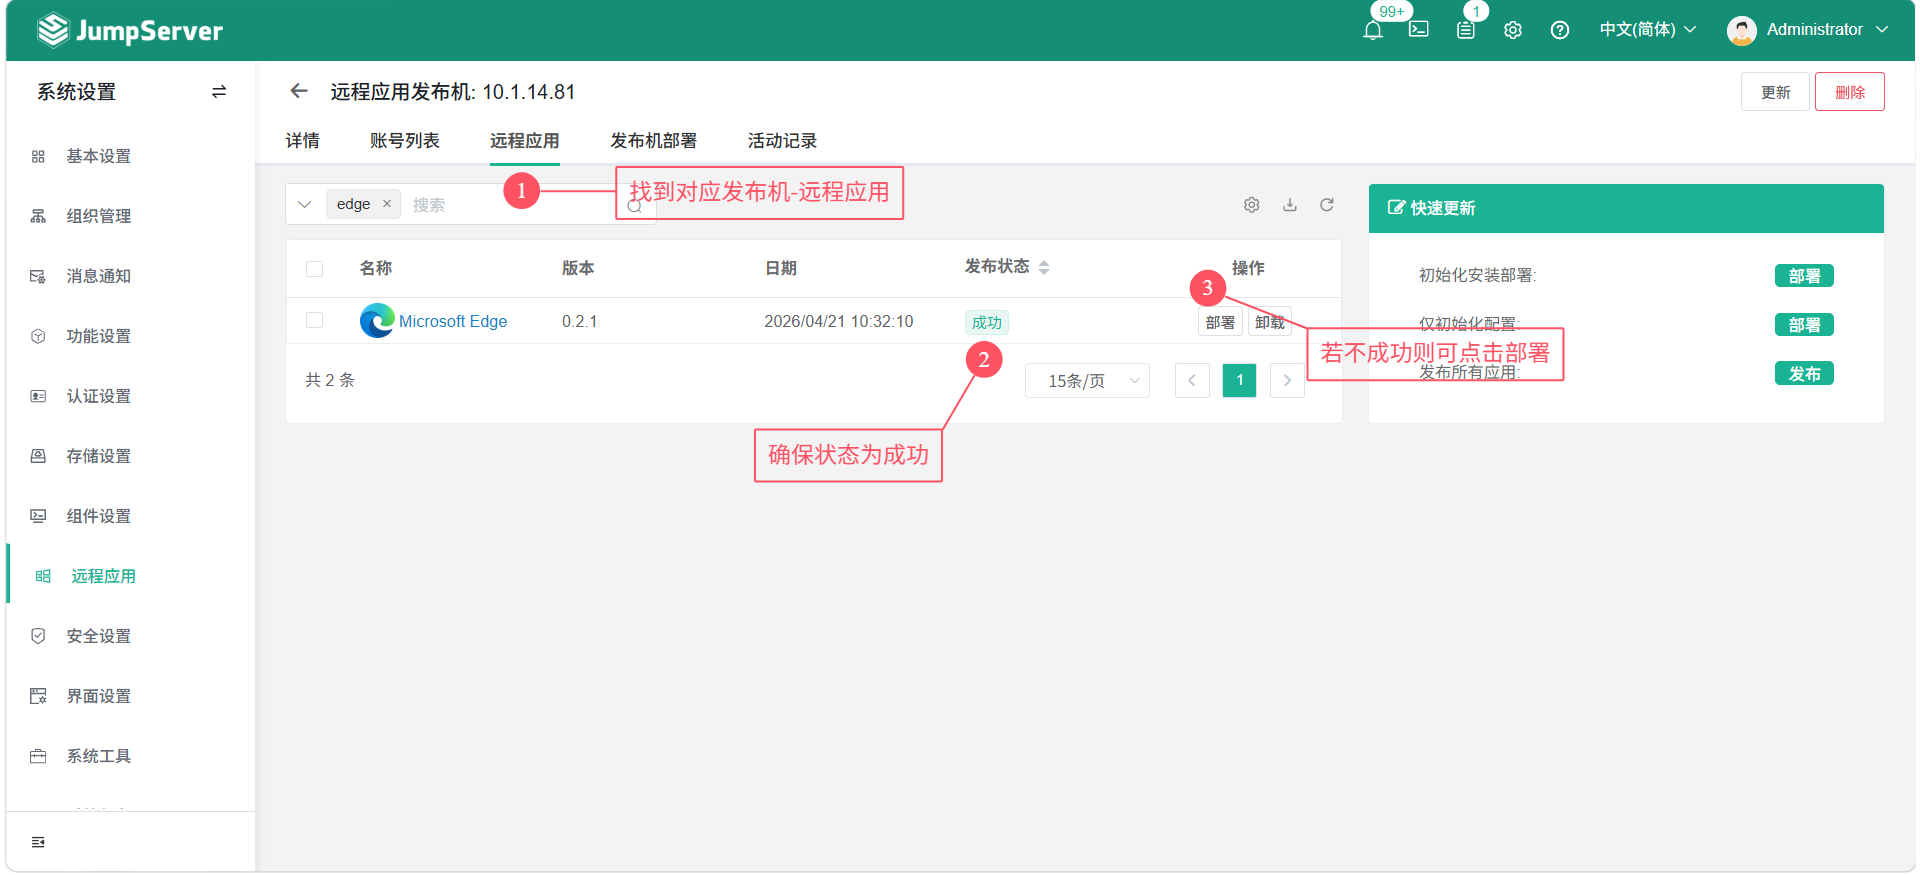
3. 确保远程应用发布机已经部署好了对应应用
4. 添加 Web 资产(以 JumpServer 为例)
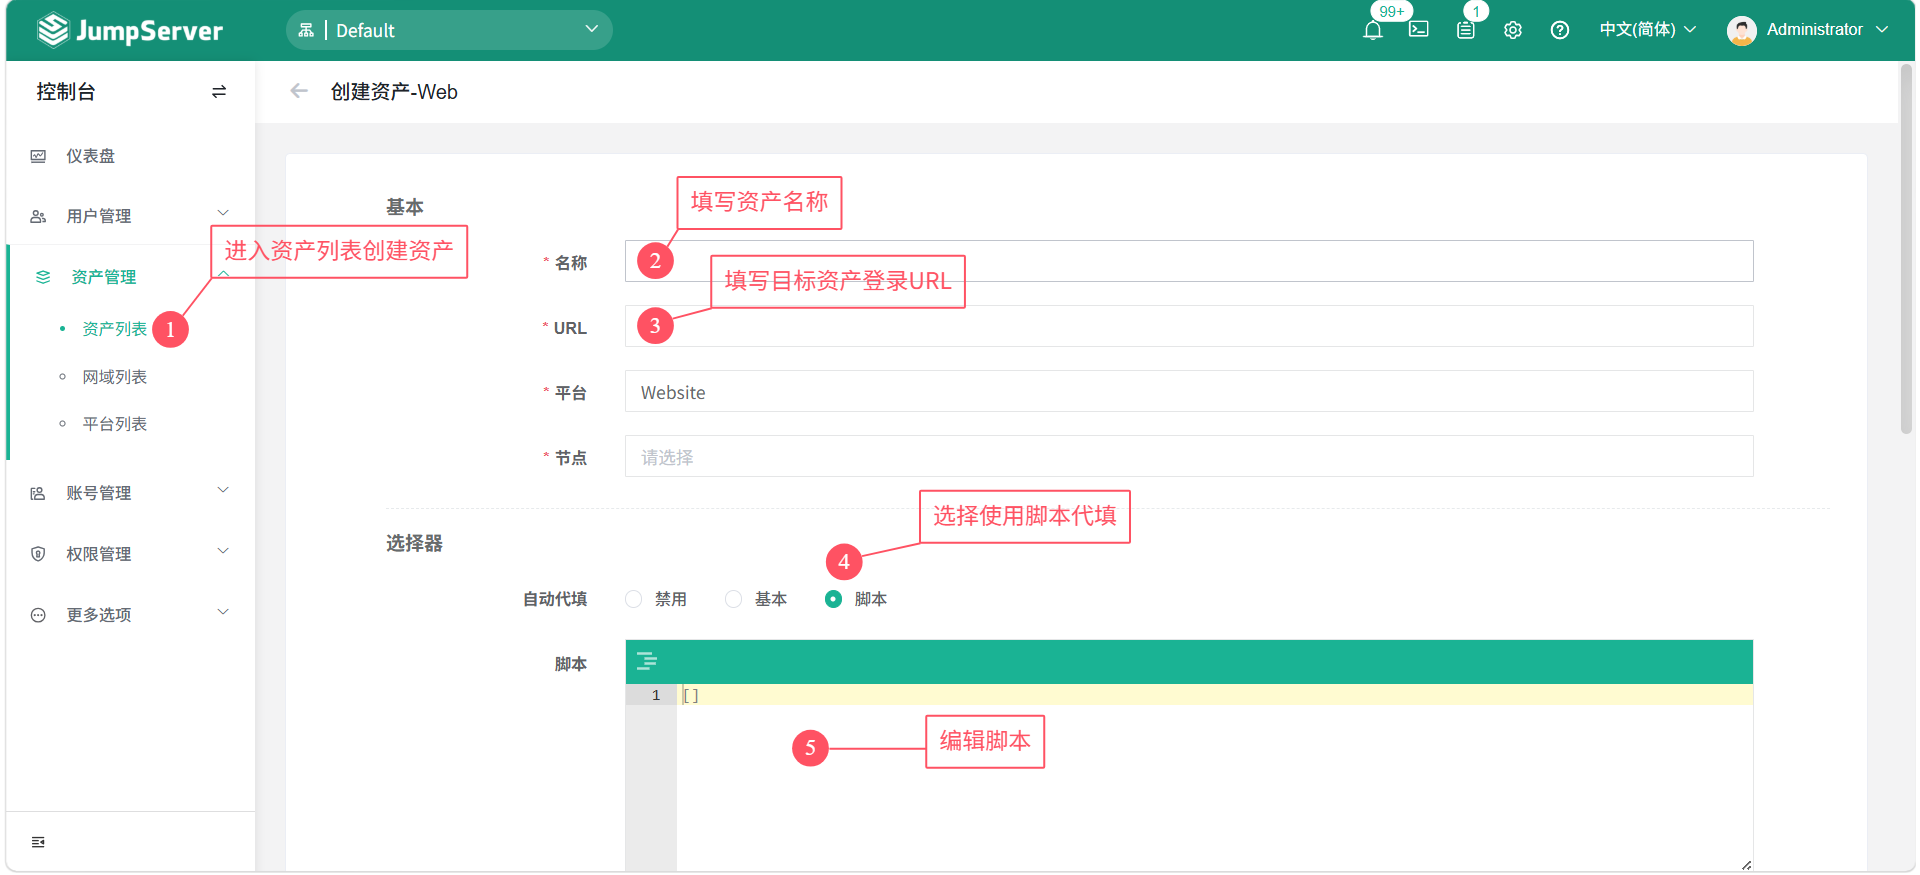
5. 编写代填脚本
一般网页有两种 OTP 填写样式:
- 类似于 JumpServer,先验证账号密码再输入 OTP
- 直接在页面输入账号密码与 OTP 密钥
先验证账号密码再输入 OTP
[
  {
    "step": 1,
    "value": "{USERNAME}",
    "target": "name=username",
    "command": "type"
  },
  {
    "step": 2,
    "value": "{SECRET}",
    "target": "id=password",
    "command": "type"
  },
  {
    "step": 3,
    "value": "",
    "target": "xpath=/html/body/div/div[2]/div[2]/div[2]/form/div[5]/button",
    "command": "click"
  },
  {
    "step": 4,
    "value": "",
    "target": "5",
    "command": "sleep"
  },
  {
    "step": 5,
    "value": "{OTP}",
    "target": "name=code",
    "command": "type"
  },
  {
    "step": 6,
    "value": "",
    "target": "xpath=/html/body/div/div[1]/div/div/div/form/button",
    "command": "click"
  }
]
直接在页面输入 OTP
[
{
"step": 1,
"target": "name=username",
"command": "type",
"value": "{USERNAME}"
},
{
"step": 2,
"target": "name=password",
"command": "type",
"value": "{SECRET}"
},
{
"step": 3,
"target": "name=otp",
"command": "type",
"value": "{OTP}"
},
{
"step": 4,
"target": "css=button[type='submit']",
"command": "click",
"value": ""
}
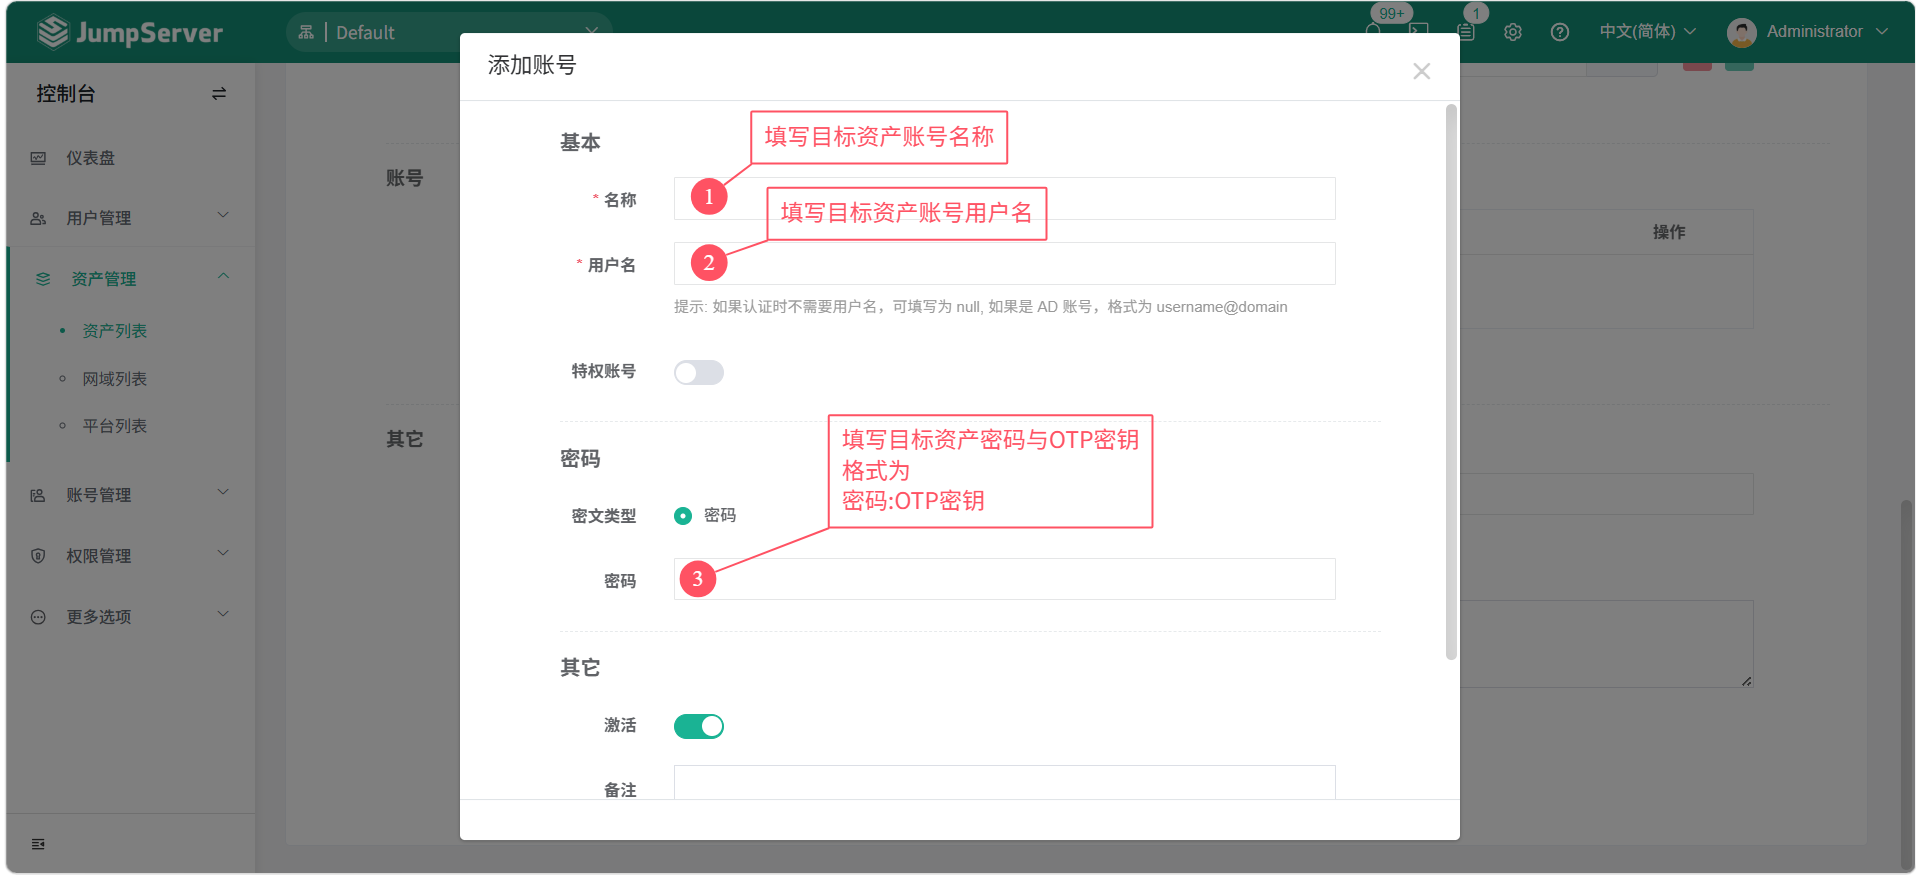
]6. 配置 OTP 密钥
密钥需要和资产的账号密码一同配置,配置示例
账号:{用户名}
密码:{密码}:{OTP密钥}
OTP 密钥通用方法:
使用二维码在线解析工具解析 OTP 二维码所含信息,信息示例:otpauth://totp/east-JMS1:hello?secret=42XXXXXXXXXXXNQ&issuer=east-JMS1
其中的 secret 即为 OTP 密钥
7. 愉快使用