

一、部署架构图
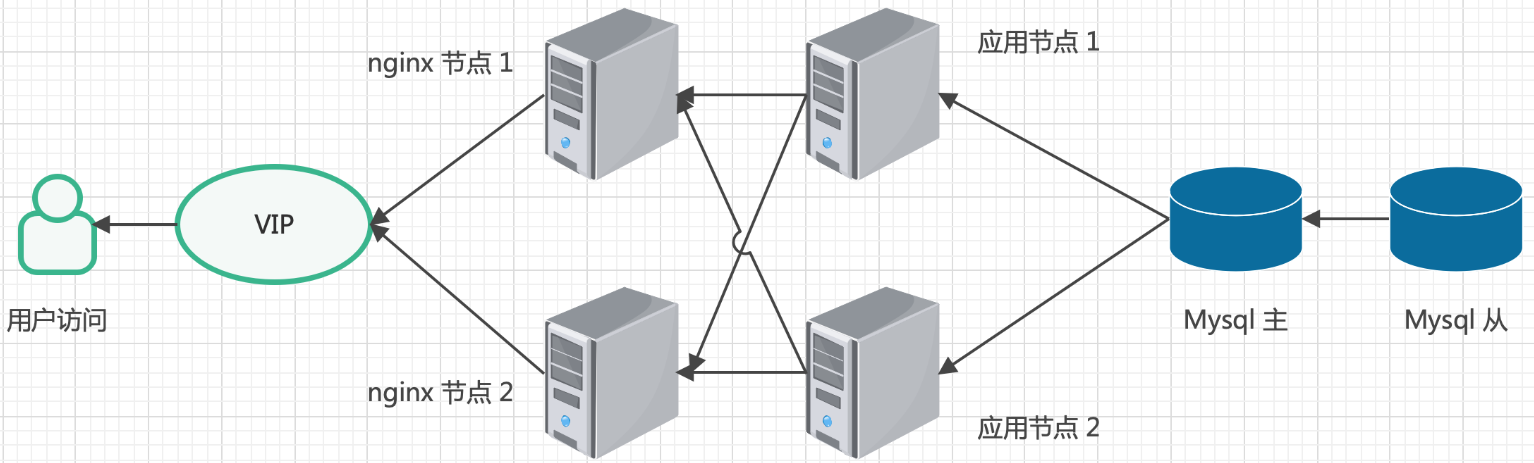
说明:
1.数据库层:两台服务器,配置主从数据库。
2.应用层:两台服务器。
3.负载均衡层:一般使用 nginx,也可使用其它负载均衡,如 ELB、DNS、A10 等等。这里以 nginx 为例,两台服务器,双机热备,使用 keepalived + vip ,vip: 10.1.12.1。
二、服务器要求
1.服务器配置
2.服务器检查
系统时间请用 CST 时间(否则对接阿里云等公有云后,账号校验会失败)。
三、数据库层 —— 主从数据库的安装和配置
参考主备部署,略。
四、应用层 —— 安装 CE Lite
参考主备部署(负载均衡部署方式不需要在应用节点 安装 keepalived),略。
五、负载均衡层 —— 安装 nginx
1. 依赖安装
yum install -y gcc-c++ pcre pcre-devel zlib zlib-devel openssl openssl-devel
离线安装参考:https://www.cnblogs.com/lovexinyi8/p/5845017.html
2. 下载 nginx
wget https://nginx.org/download/nginx-1.17.0.tar.gz
3. 解压 nginx
tar xvf nginx-1.17.0.tar.gz
4. 配置安装 nginx
mkdir -p /var/temp/nginx
cd nginx-1.17.0
./configure --user=nobody --group=nobody --prefix=/usr/local/nginx --conf-path=/usr/local/nginx/conf/nginx.conf --pid-path=/usr/local/nginx/conf/nginx.pid --lock-path=/var/lock/nginx.lock --error-log-path=/var/log/nginx/error.log --http-log-path=/var/log/nginx/access.log --with-http_gzip_static_module --http-client-body-temp-path=/var/temp/nginx/client --http-proxy-temp-path=/var/temp/nginx/proxy --http-fastcgi-temp-path=/var/temp/nginx/fastcgi --http-uwsgi-temp-path=/var/temp/nginx/uwsgi --http-scgi-temp-path=/var/temp/nginx/scgi --with-http_ssl_module --with-http_gzip_static_module --with-stream
make
make install
5.添加nginx服务
cat <<EOF >> /lib/systemd/system/nginx.service
[Unit]
Description=nginx
After=network.target
[Service]
Type=forking
ExecStart=/usr/local/nginx/sbin/nginx
ExecReload=/usr/local/nginx/sbin/nginx -s reload
ExecStop=/usr/local/nginx/sbin/nginx -s quit
PrivateTmp=true
[Install]
WantedBy=multi-user.target
EOF
6.配置nginx
修改 /usr/local/nginx/conf/nginx.conf 文件,加上 include /usr/local/nginx/conf.d/*.conf;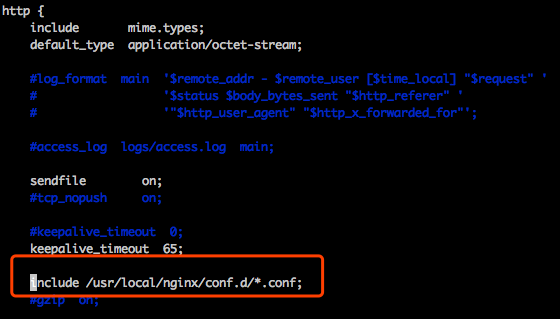
7.添加 nginx 配置文件
创建配置文件目录 /usr/local/nginx/conf.d
mkdir -p /usr/local/nginx/conf.d
8.创建配置文件 f2c.conf
# ==== FIT2CLOUD LB Test Start Here ====
upstream servers.cmp.com {
  ip_hash;
  server 10.1.12.2:80 weight=2 fail_timeout=10s max_fails=1;
  server 10.1.12.3:80 weight=1 fail_timeout=10s max_fails=1;
}

server {
  listen 80;
  location / {
    proxy_pass http://servers.cmp.com;
    add_header X-Upstream $upstream_addr;
    proxy_set_header X-Real-IP $remote_addr;
    # proxy_next_upstream配置当前定向到的后端,返回下列内容时重新分配新的后端
    proxy_next_upstream error timeout http_404 http_502 http_503;
    proxy_set_header Host $host;
    proxy_set_header X-Forwarded-For $proxy_add_x_forwarded_for;
  }
}
# ==== FIT2CLOUD LB Config End Here ====
9. 重启 nginx 服务
service nginx restart
说明:在两个 nginx 节点服务器上安装 nginx 。
六、负载均衡层 —— 安装 keepalived
参考主备部署,略。
1. keepalived 监控 nginx 脚本
1)让 keepalived 监控 nginx 的状态
vi /opt/chk_nginx.sh

#!/bin/bash
counter=$(ps -C nginx --no-heading|wc -l)
echo "$counter"
if [ "${counter}" = "0" ]; then
    #/usr/local/nginx/sbin/nginx -c /usr/local/nginx/conf/nginx.conf
    service nginx restart
    sleep 2
    counter=$(ps -C nginx --no-heading|wc -l)
    echo "$counter"
    if [ "${counter}" = "0" ]; then
        /etc/init.d/keepalived stop
    fi
fi
2)设置脚本文件的权限并测试
chmod 755 /opt/chk_nginx.sh
sh /opt/chk_nginx.sh
七、访问
可以通过 vip 地址访问 ce 服务:http://10.1.12.1 。